Map Object
The map
object
(class name:
obj_gmap) displays an embedded Google map in Thin
Client displays.
In the Builder, an obj_gmap instance appears as a gray rectangle which you use
to set the size and position of the map
object on your display, and also configure the
latitude, longitude, zoom level and other map
object properties via the Builder's
property sheet. The Google map is only rendered when the display is opened in
the Thin Client.
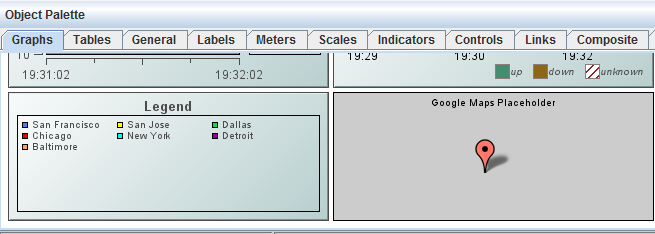
In the Builder and Viewer, an obj_gmap instance appears
as an empty gray rectangle (as shown in the following illustration). The Viewer does not support the map object.
Using the map
object properties and RTView data attachments, the map
object can be populated
with marker objects at specific latitude/longitude positions, and also links
between the markers. RTView drilldown and command operations can be triggered by
clicks on the map object,
as well as on its markers and links. Double-click, right-click and drillDownColumn substitutions are supported as
on other RTView table-driven objects.
Operations such as zoom, pan and
marker selection can be tied to RTView variables.
The Thin Client must have internet access in order to download the Google Maps
javascript API and map data. The Thin Client supports Google Maps in Internet
Explorer version 9 or newer, and any other RTView-supported browsers (Firefox,
Chrome, iOS Safari).
The Thin Client loads the Google Maps Javascript API to render and manipulate
the map. In most cases a key or license must be obtained from Google for
business use of the Google Maps Javascript API. For details, see the
Licensing section.
Using Data Properties
To attach data to the map object, right-click in the Property
Value field of the valueTable
property and select Attach to Data.
The valueTable
property can be used to place markers (icons)
on the map, at specific locations. The property must be attached to a table that
contains one row for each marker. The column names
are unimportant, but the column order and type must be as follows. The first
three
columns are required, the others are optional.
column 1 (string): The name.
column 2 (number): The latitude.
column 3 (number): The longitude.
column 4 (string): The icon name/path.
column 5 (integer): The icon height in pixels.
The marker name must be unique as it is used in
drilldowns to indicate the selected ("clicked") marker, and can also be used to
select a marker. If column 4 (icon name) is
omitted or empty, the default Google Maps marker is used. If column 5 (icon
height) exists and its value is > 0, the value is used to center the icon on the
marker's latitude/longitude position, otherwise the 0,0 pixel of the icon will
be placed on the marker's latitude/longitude position.
Use the valueTableForLinks property to draw links between markers
on the map. The property must be attached to a table that contains one row for
each link, with the columns shown below. The column names are unimportant, but
the column order and type must be as follows. The first 2 columns are required,
the others are optional.
column 1 (string): The name of marker at
start of link.
column 2 (string): The name of marker at end of link.
column 3 (string): The link line color, as a css color name or #rrggbb hex
value.
column 4 (integer): The link line width.
column 5 (integer): The arrow mode.
The first two columns specify the names of the
markers at the start and end of the link. These must correspond to the names of
markers in the valueTable. If column 3 is omitted the link color is
black. If column 4 is omitted the link width is 2 pixels. The arrow mode values
are 1 (one arrow, pointing to start marker), 2 (one arrow,
pointing to end marker) and 3 (two markers, at each end of link). If
column 5 is omitted the default mode of 3 is used.
Using Interaction Properties
Use the command property
to invoke behavior when the user clicks
on the map, a marker, or a link.
The drillDownColumnSubs property is treated the same as for other
table-driven objects. If a marker is clicked, the drillDownColumnSubs are
set using values from the valueTable row that corresponds to that marker.
If a link is clicked, the drillDownColumnSubs are set using values from
the valueTableForLinks row that corresponds to that link. In addition,
the following predefined substitutions are also set when a drilldown is
executed:
- $mapSelLat: The latitude of the map location
or marker clicked.
- $mapSelLng: The longitude of the map
location or marker clicked.
- $mapLat: The latitude of the map's current
center location.
- $mapLng: The longitude of the map's current
center location.
- $mapZoom: The current zoom level of the map,
a value between 0 and 21.
The drillDownSelectMode property can
be set to the following values:
- Anywhere: A click anywhere on the
map triggers the object's command or drilldown.
- Markers: Only a click on a marker
triggers the command or drilldown.
- Links: Only a click on a link
triggers the command or drilldown.
- Markers & Links: Only a click on
a marker or a link triggers the command or drilldown.
Using Map Properties
If the
labelsZoomThreshold property is set to a value > 0 a label balloon
appears next to each marker when the zoom level is greater than or equal
to that value. The label text in the balloon is the name assigned to the
marker, by the first column in the valueTable. A label can be
closed by clicking its "x" button. The label reappears if the display is
closed and reopened or if the zoom threshold is crossed again later. The
default value of labelsZoomThreshold is zero which disables the
labels.
The latitude property specifies the latitude of the point on
which the map is to be centered. The longitude property specifies
the longitude of the point on which the map is to be centered. The
selectedMarker property specifies
the name of the marker to select. The zoom property specifies the
zoom level of the map, between 0 and 21.
The other properties supported by the map object but not listed here are
common to all display objects, and have the same purpose and behavior as
on the other display objects.
Licensing
Business use of the Google Maps Javascript API typically
requires a key or license from Google. For more information, see the
following:
https://developers.google.com/maps/licensing
SL does not provide a key or license
for the Google Maps Javascript API. However, the Thin Client can be
configured to download the API using a custom URL that contains specific
key or license information obtained from Google. The custom URL is
defined by modifying the rtv_custom.js file contained in
rtvdisplay.war. Refer to the Customization section for details about modifying rtvdisplay.war.
To specify a custom URL to download the Google Maps Javascript API, add
the following line to rtv_custom.js:
rtv.customGoogleMapsApiBaseURL = 'url';
For example, to specify a URL containing a Google API key:
rtv.customGoogleMapsApiBaseURL = "https://maps.googleapis.com/maps/api/js?key=YOUR_GOOGLE_API_KEY";
Or, to specify a "Google Maps API for Work" client ID and release
version 3.20:
rtv.customGoogleMapsApiBaseURL = "https://maps.googleapis.com/maps/api/js?client=YOUR_GOOGLE_CLIENT_ID&v=3.20";
If no rtv.customGoogleMapsApiBaseURL value is specified, the Thin Client
uses the following public URL to download the latest "experimental"
version of the API with no key or license information:
https://maps.googleapis.com/maps/api/js.
Data
Properties
Specify how data is displayed in the map
object.
| Property
Name |
Description |
| valueTable |
Attach data to the map object using this
property.
The valueTable
property can be used to place markers (icons)
on the map, at specific locations. The property must be attached to a table that
contains one row for each marker. The column names
are unimportant, but the column order and type must be as follows. The first
three
columns are required, the others are optional.
column 1 (string): The name.
column 2 (number): The latitude.
column 3 (number): The longitude.
column 4 (string): The icon name/path.
column 5 (integer): The icon height in pixels.
The marker name must be unique as it is used in
drilldowns to indicate the selected ("clicked") marker, and can also be used to
select a marker. If column 4 (icon name) is
omitted or empty, the default Google Maps marker is used. If column 5 (icon
height) exists and its value is > 0, the value is used to center the icon on the
marker's latitude/longitude position, otherwise the 0,0 pixel of the icon will
be placed on the marker's latitude/longitude position. |
valueTableForLinks
|
This property can be
used to draw links between markers on the map. The property must be attached to
a table that contains one row for each link, with the columns shown below. The
column names are unimportant, but the column order and type must be as follows.
The first 2 columns are required, the others are optional.
column 1 (string): The name of marker at
start of link.
column 2 (string): The name of marker at end of link.
column 3 (string): The link line color, as a css color name or #rrggbb hex
value.
column 4 (integer): The link line width.
column 5 (integer): The arrow mode. The first two columns specify the names of the
markers at the start and end of the link. These must correspond to the names of
markers in the valueTable. If column 3 is omitted the link color is
black. If column 4 is omitted the link width is 2 pixels. The arrow mode values
are 1 (one arrow, pointing to start marker), 2 (one arrow,
pointing to end marker) and 3 (two markers, at each end of link). If
column 5 is omitted the default mode of 3 is used. |
Interaction Properties
Specify interactions in the map object.
| Property
Name |
Description |
| command |
Assign a command to
your map object. See Building
Displays>Define/Execute Command for information. |
|
commandCloseWindowOnSuccess |
If selected, the
window that initiates a system command will automatically close when the system
command is executed successfully. This
property only applies to system commands.
With data source commands, the window is closed
whether or not the command is executed successfully.
For multiple commands, this property is applied
to each command individually. Therefore if the first command in the multiple
command sequence succeeds, the window will close before the rest of the commands
are executed.
NOTE: The commandCloseWindowOnSuccess
property is not supported in the Display Server. |
|
commandConfirm |
If selected, the
command confirmation dialog is enabled. Use the commandConfirmText
property to write your own text for the confirmation dialog, otherwise text from
the command property will be used. For
multiple commands, if you Confirm the execution then all individual commands
will be executed in sequence with no further confirmation. If the you Cancel the
execution, none of the commands in the sequence will executed. |
|
commandConfirmText |
Enter command
confirmation text directly in the Property Value field or select the  button to open the Edit commandConfirmText dialog. If
commandConfirmText is not specified, then
text from the command property will be used.
button to open the Edit commandConfirmText dialog. If
commandConfirmText is not specified, then
text from the command property will be used. |
|
drillDownColumnSubs |
Select the
button to open the Drill Down
Column Substitutions dialog to customize which substitutions will be passed into
drill down displays. |
| drillDownSelectMode |
Control how a drill
down display is activated. Select one of the following options:
- Anywhere: A click anywhere on the
map triggers the object's command or drilldown.
- Markers: Only a click on a marker
triggers the command or drilldown.
- Links: Only a click on a link
triggers the command or drilldown.
- Markers & Links: Only a click on a
marker or a link triggers the command or drilldown.
|
| drillDownTarget |
Name of display (.rtv)
file targeted as a drill down. See Building
Displays>Drill Down Displays for information. |
|
menuItemGroup |
Use the menuItemGroup property to extend
RTView context
menu items. For details, see
Extending the Context Menu. |
Label Properties
Specify the label in the map object.
| Property
Name |
Description |
| label |
Specifies the label string for the map
placeholder object. This is visible only in the Builder.Edit label text directly in the Property Value
field or select the
button to open the Edit Label dialog. |
Map Properties
Specify the position, zoom level and label
behavior in the map object.
| Property
Name |
Description |
| labelsZoomThreshold |
If the
labelsZoomThreshold property is set to a value > 0 a label balloon
appears next to each marker when the zoom level is greater than or equal
to that value. The label text in the balloon is the name assigned to the
marker, by the first column in the valueTable. A label can be
closed by clicking its "x" button. The label reappears if the display is
closed and reopened or if the zoom threshold is crossed again later. The
default value of labelsZoomThreshold is zero which disables the
labels. |
| latitude |
The latitude of the point on which the map is to be
centered. |
| longitude |
The longitude of the point on which the map is to be
centered. |
| selectedMarker |
The name of the marker to select.
|
| zoom |
The zoom level of the map, between 0 and 21.
|
Object Properties
Specify the layout in the map object.
| Property
Name |
Description |
| anchor |
Specify where to
anchor an object in the display. NOTE: If an object has the dock property
set, the anchor property will be ignored.
The anchor property is only applied when the
dimensions of the display are modified, either by editing
Background Properties or resizing the window in
Layout mode
Select None, or one or more the following
options:
| None
|
Object
not anchored. This is the default. |
| Top |
Anchor
top of object at top of display. |
| Left |
Anchor
left side of object at left of display. |
| Bottom |
Anchor
bottom of object at bottom of display. |
| Right |
Anchor
right side of object at right of display. |
When a display is resized, the number of pixels
between an anchored object and the specified location remain constant. If an
object is anchored on opposite sides (i.e. Top and Bottom or
Left and Right), the object will be stretched to fill the available
space. |
| dock |
Specify the docking
location of an object in the display.
Select from the following options:
| None
|
Object
is not docked. This is the default. |
| Top |
Dock
object at top of display. |
| Left |
Dock
object at left of display. |
| Bottom |
Dock
object at bottom of display. |
| Right |
Dock
object at right of display. |
| Fill |
Dock
object in available space remaining in the display after all docked objects
are positioned. |
If the dimensions of the display are modified,
either by editing Background Properties or
resizing the window in Layout mode, the
properties (objX, objY, objWidth and objHeight) of
docked objects will automatically adapt to match the new size of the display.
When multiple objects are docked to the same side
of the display, the first object is docked against the side of the display, the
next object is docked against the edge of the first object, and so on.
When objects are docked to multiple sides of the
display, the order in which objects were added to the display controls docking
position. For example, let's say the first object added to the display is docked
at the Top and the second object is docked at the Left.
Consequently, the first object will fill the entire width of the display and the
second object will fill the left side of the display from the bottom of the
first object to the bottom of the display.
Objects in a display have the dock property set
to Fill, are laid out across a grid in the available space remaining
after all docked objects are positioned. By default, the grid has one row and as
many columns as there are objects in the display. You can modify the grid in the
Background Properties dialog.
Once an object is docked, there are some
limitations on how that object can be modified.
- Docked objects cannot be dragged or
repositioned using objX and objY properties.
- Docked objects cannot be resized using the
objWidth or objHeight properties. To resize you must drag on the
resize handle.
- Docked objects can only be resized toward the
center of the display (e.g. If an object is docked at the Top, only its
height can be increased by dragging down toward the center of the display).
- Docked objects set to Fill cannot be
resized at all.
- Docked objects cannot be moved using Align.
Non-docked objects can be aligned against a docked object, but a docked object
will not move to align against another object.
- Docked objects are ignored by Distribute.
|
| objHeight |
Set height of the object in pixels. |
| objName |
Name given to facilitate object management via
the Object List dialog. Select Tools>Object List. |
| objWidth |
Set width of the object in pixels. |
| objX |
Set the x-axis position of object. |
| objY |
Set the y-axis position of object. |
| styleClass |
Enter the style class name for this object as
defined in your style sheet.
If not specified, the object class name is used. NOTE: The value entered
must not contain spaces and cannot start with rtv-. |
| visFlag |
Controls visibility of the object. |
|