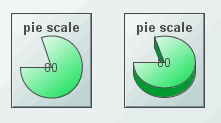
Pie Scales
Alert Properties
| Property
Name |
Description |
|
thresholdColorPieFlag |
If
selected, a portion of the pie will display the threshold color when it
exceeds that threshold. This property only applies if either the valueHighAlarmEnabledFlag or the
valueHighWarningEnabledFlag is selected. |
| thresholdLineThickness |
Select
Thin, Medium or Thick to set the thickness of the threshold lines. This
property is only used if the thresholdLineVisFlag is selected. |
| thresholdLineVisFlag |
Select
to draw a line across the bar at the level of each enabled threshold. This
line will be the same color as the threshold color. This property is only
used if the valueHighAlarmEnabledFlag or valueHighWarningEnabledFlag is
selected. |
| valueHighAlarmEnabledFlag |
Select to enable the high
alarm range and the following related properties:
| valueHighAlarm |
Specify the minimum value for the
high alarm range.
|
| valueHighAlarmColor |
Specify the color for the high alarm range. |
|
| valueHighWarningEnabledFlag |
Select to enable
the high warning range and the following related properties:
| valueHighWarning |
Specify the minimum value for
the high warning range.
|
| valueHighWarningColor |
Specify the color for the high warning range. |
|
Background Properties
Data Properties
| Property
Name |
Description |
| value |
Attach your data. |
|
valueDivisor |
If
specified, this divisor is applied to the value, valueMin and valueMax. |
|
valueMax |
Set
the maximum range for the scale. This value must be larger than valueMin. |
|
valueMin |
Set
the minimum range for the scale. This value must be smaller than valueMax. |
Data Format Properties
| Property
Name |
Description |
| valueFormat |
Select
or enter the numeric format of value displayed in the value label. To enter a
format, use syntax from the Java DecimalFormat class. |
|
valueTextColor |
Select the  button and choose from the palette to set
the color of the value label.
button and choose from the palette to set
the color of the value label. |
|
valueTextFont |
Select
the font to use for the value label. |
|
valueTextHeight |
Specify
the height for the value label. |
|
valueTextPosition |
Set
the position of value label. Select from the following options:
- Outside Max - Position outside
the maximum value.
- Inside Max - Position inside the maximum value.
- Outside Current - Position
outside the current value.
- Inside Current - Position inside the current value.
- Center - Position at the center
of the scale.
- Inside Min - Position inside the minimum value.
- Outside Min - Position outside
the minimum value.
|
|
valueVisFlag |
Control visibility of the value label. |
Interaction Properties
| Property
Name |
Description |
| command |
Assign a command to
your pie scale. See Building
Displays>Define/Execute Command for information. |
|
commandCloseWindowOnSuccess |
If selected, the
window that initiates a system command will automatically close when the system
command is executed successfully. This
property only applies to system commands.
With data source commands, the window is closed
whether or not the command is executed successfully.
For multiple commands, this property is applied
to each command individually. Therefore if the first command in the multiple
command sequence succeeds, the window will close before the rest of the commands
are executed.
NOTE: The commandCloseWindowOnSuccess
property is not supported in the Display Server. |
|
commandConfirm |
If selected, the
command confirmation dialog is enabled. Use the commandConfirmText
property to write your own text for the confirmation dialog, otherwise text from
the command property will be used. For
multiple commands, if you Confirm the execution then all individual commands
will be executed in sequence with no further confirmation. If the you Cancel the
execution, none of the commands in the sequence will executed. |
|
commandConfirmText |
Enter command
confirmation text directly in the Property Value field or select the
button to open the Edit commandConfirmText dialog. If
commandConfirmText is not specified, then
text from the command property will be used. |
| drillDownTarget |
Name of display (.rtv)
file targeted as a drill down. See Building
Displays>Drill Down Displays for information.
When you double-click on a trace in the scale,
the following predefined substitutions will be set on the specified
drillDownTarget:
- $traceNumber - number of the trace (1 to 10)
that contains the selected point
- $traceLabel - label of selected trace
- $pointValue - data value of point
- $pointTimestamp - timestamp of point
- $pointLabel - data label (if any) of point
- $pointIndex - position of point in trace data
(0 to maxPointsPerTrace)
NOTE: When drillDownSelectMode is set to
Anywhere double-clicking anywhere on the scale will activate the
specified drillDownTarget, however you must double-click on a trace in
the scale to set the substitutions listed above. |
|
mouseOverText |
Enter a tool tip for
this scale. To
display the tool tip, move your mouse over the object. To enter a multi-line
tool tip, use \n to delimit the lines (e.g. my\nscale). NOTE: The object
must be visible (i.e. visFlag property is selected), in order for the
tool tip to be visible. |
Label Properties
| Property
Name |
Description |
| label |
Edit label text directly in the Property Value
field or select the
button to open the Edit Label dialog. |
| labelMinTabWidth |
Specify minimum width of the label tab. NOTE:
This property is only applies if labelTextPosY is
set to TabTop. |
| labelTextColor |
Select the
button and choose from the palette to set the color of the label text. |
| labelTextFont |
Select the font style of the label text from drop
down menu. |
| labelTextHeight |
Set the height (in pixels) of the label text. |
|
labelTextPosX |
Set
x-axis position of label text. Select from the following options:
- Left - Position outside the left
side of the background rectangle.
- Inside Left - Position inside the left side of the background
rectangle.
- Center
-
Position in the center of the background rectangle.
- Inside Right - Position inside the
right side of the background rectangle.
- Right - Position outside the right side of the background
rectangle.
|
|
labelTextPosY |
Set
y-axis position of label text. Select from the following options:
- Outside Top - Position well above the background rectangle.
- Top -
Position just above the background rectangle.
- Title Top - Position along the top
line of the background rectangle.
- Tab Top - Position tab just above the background rectangle. NOTE: Height
and width of the label tab is dependent on the height and width of the text. Use
the labelMinTabWidth property to specify a minimum tab width.
- Inside Top - Position inside the top
of the background rectangle.
- Center - Position in the center of the background rectangle.
- Inside Bottom - Position inside the
bottom of the background rectangle.
- Bottom - Position just below the background rectangle.
- Outside Bottom
- Position well below
the background rectangle.
|
|
labelVisFlag |
Control visibility of the label. |
Object Properties
| Property
Name |
Description |
| objHeight |
Set height of the object in pixels. |
| objName |
Name given to facilitate object management via
the Object List dialog. Select Tools>Object List. |
| objWidth |
Set width of the object in pixels. |
| objX |
Set the x position of the object. |
| objY |
Set the y position of the object. |
| transparencyPercent |
Set transparency of the object. Enter a value
between 0 and 100. A value of 0, the default, sets the object to be completely
opaque. A value of 100 will render the object completely transparent. |
| visFlag |
Control visibility of the object. |
Pie Properties
| Property
Name |
Description |
| clockWiseFlag |
If selected,
the pie is drawn from the start angle in a clockwise direction. Otherwise, it
is drawn counter-clockwise. |
|
pie3dThickness |
Specify
the thickness of the 3D edge of the pie. If the value is 0, the pie will be
drawn 2D. |
|
pieBgColor |
Select the
button and choose from the palette to set the color of the
background color of the pie. NOTE: This property only
applies if pieBgOpaqueFlag is selected. |
|
pieBgOpaqueFlag |
If
selected, the pie background is filled in. Otherwise, it is transparent. |
|
pieBorderColor |
Select the border color for the pie. NOTE: This
property only applies if pieBorderFlag
is selected. |
|
pieBorderFlag |
If selected, a border is displayed around the edge of the pie. |
|
pieColor |
Select the
button and choose from the palette to set the color of
the pie. |
|
pieGradientColor2 |
Select the
button and choose from the palette to set
the second
color in the gradient. The pieColor property sets
the first color in the gradient. NOTE: This property will be ignored if pieGradientMode
is set to None. |
|
pieGradientMode |
Display
a gradient in the pie. Select from the following options:
- None -
No gradient.
- Diagonal Edge - Gradient is drawn at a
45 degree angle from the top left to the bottom right corner.
- Diagonal Center - Gradient is drawn at a
45 degree angle from the center to the top left and the bottom right corners.
- Horizontal Edge - Gradient is drawn
horizontally from the top to the bottom.
- Horizontal Center - Gradient is drawn horizontally from the
center to the top and bottom.
- Vertical
Edge - Gradient is drawn vertically from the left to the right.
- Vertical Center - Gradient
is drawn vertically from the center to the left and right.
|
|
pieRaisedFlag |
Reverses
the direction of the gradient. |
|
startAngle |
Set
the start angle of the pie. Start angles range from 0 to 360,
with 0 pointing straight to the right and increasing clockwise around
the circle. Default is 180 (pointing straight to the left). |
|